Contents
Flood damage costs come from mold and moisture that spread after the water recedes. You need to cut power, document the loss, and remove standing water and soaked debris fast. Then dry walls, floors, and hidden spaces, disinfect hard surfaces, and sort porous materials for salvage or disposal. If you miss trapped moisture or a musty odor, the damage can keep growing in ways you won’t see yet.
Key Takeaways
- Cut power safely, move family to dry space, and document damage for insurance claims.
- Remove standing water quickly with pumps, wet vacs, and squeegees.
- Tear out soaked insulation, ruined drywall, and debris to reduce contamination.
- Dry walls and floors immediately using fans, dehumidifiers, and open access panels.
- Clean and disinfect salvageable surfaces, then inspect for moisture and mold growth.
Storm Flood Cleanup: Stop Damage Fast
When storm floodwater hits, you need to act fast to stop the damage from spreading. First, cut power at the breaker if it’s safe, then document every affected room for your flood insurance claim.
Next, move your family to a dry area and grab your emergency kits, including flashlights, gloves, masks, and bottled water. Protect your team by wearing boots and eye protection, and ventilate the space if weather allows.
You should remove salvageable valuables from damp zones, but don’t stress over perfection—focus on safety and control. Call your insurer, your local cleanup crew, and your trusted neighbors so you’re not handling it alone.
Fast action keeps damage contained and helps your crew recover together.
Remove Standing Water and Wet Debris
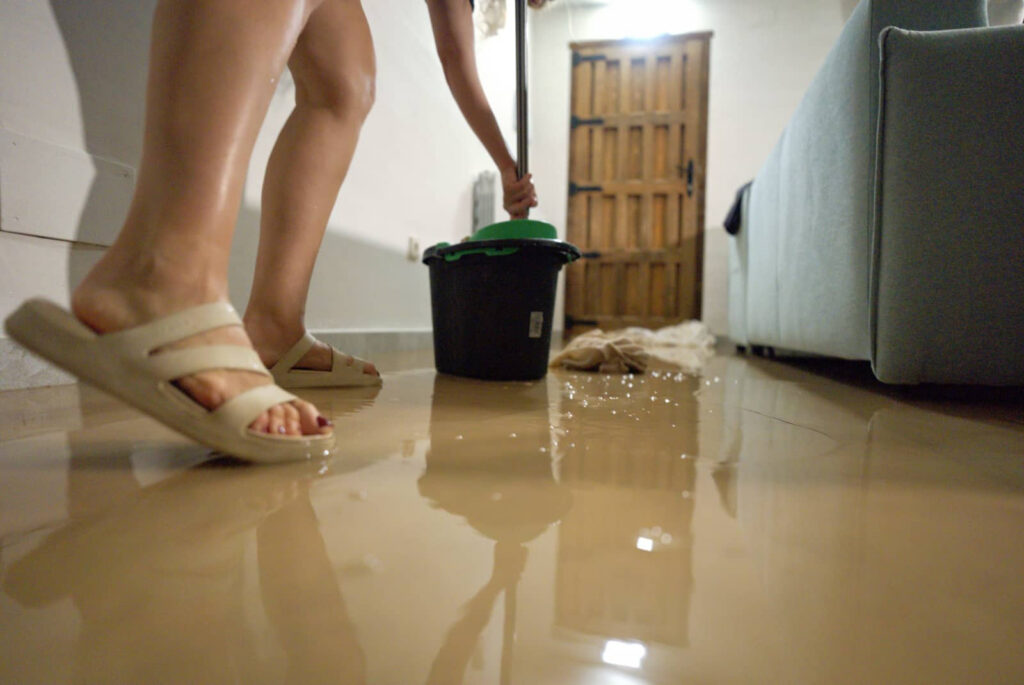
Once you’ve stabilized the area and protected the people inside, remove standing water and wet debris right away so the flood doesn’t keep spreading through floors, walls, and contents.
Use proven water removal techniques like pumps, wet vacs, and squeegees to move water out fast. Choose equipment options based on depth, access, and power availability, and keep the work area clear so your team can move safely and efficiently.
Scoop out soaked insulation, ruined drywall, broken furniture, and mud as soon as you can; heavy debris holds moisture and slows recovery. Bag waste promptly, then haul it offsite to cut odors and contamination.
Work methodically, starting at the lowest points, so you stay in control and your cleanup crew can restore the space together.
Dry Walls, Floors, and Hidden Spaces
Start drying walls and floors immediately, and open baseboards or access panels so you can dry wall cavities before mold takes hold.
Use fans, dehumidifiers, and directed airflow to ventilate hidden spaces under cabinets, behind trim, and inside closets.
Keep checking moisture levels until every concealed area is dry and stable.
Dry Wall Cavities
Water can wick deep into dry wall cavities, floor voids, and other hidden spaces, so you need to open up affected areas quickly and inspect beyond the visible surface.
Remove baseboards, cut inspection openings, and check insulation, framing, and fasteners for saturation or contamination. If materials stayed wet, you should pull them out before mold takes hold.
Keep labels on salvageable drywall and separate damaged pieces from clean stock. During drywall installation, verify moisture barriers are intact and sealed at seams, joints, and penetrations.
Replace soaked insulation and any swollen framing members. You’re not handling this alone; these steps help protect your crew, your home, and everyone who depends on a safe, dry rebuild.
Act fast and document every cavity before closing it back up.
Ventilate Hidden Spaces
After you’ve opened wall cavities and floor voids, keep air moving through every hidden space so trapped moisture doesn’t stall the dry-out.
You should place air movers to push air into corners, under cabinets, and behind baseboards, then use dehumidifiers to pull vapor from the room.
Open nearby access points, remove wet insulation, and lift flooring where needed so airflow reaches joists and subfloors.
Rotate equipment daily and check cool surfaces for condensation.
These ventilation techniques speed evaporation and support mold prevention, especially in enclosed areas where stagnant air can hide damage.
Stay with your crew, stay alert, and keep testing moisture until readings drop to safe levels.
If you smell musty odors or see dark spotting, treat it as a warning and act fast.
Disinfect Surfaces to Prevent Mold
Disinfect every hard surface as soon as it’s safe to enter the area, because floodwater can leave behind bacteria, sewage, and mold spores that spread quickly in damp conditions.
You should scrub walls, counters, floors, and fixtures with a detergent first, then apply an EPA-registered disinfectant for mold prevention. Follow the label exactly, keep surfaces wet for the required contact time, and reapply if they dry too soon.
Wear gloves, eye protection, and a respirator if spray is possible. Use separate buckets, clean cloths, and fresh solution for each room so you don’t move contamination around.
Focus on high-touch areas and any surface treatments that stayed wet. When you work methodically, you protect your home and your crew.
Save or Remove Porous Materials
You need to inspect porous materials fast and decide what you can realistically salvage.
Keep only items that dry quickly, hold their shape, and show no persistent contamination; if they’re saturated, warped, or stained, remove them.
Waterlogged porous items trap moisture and microbes, so you should discard them before mold spreads.
Evaluate Salvageable Materials
Start by sorting every wet item into two groups: porous materials you may need to discard and nonporous materials you can usually clean and salvage.
Then make a quick material assessment: check drywall, insulation, ceiling tiles, carpet pad, and upholstered items for saturation, warping, and contamination. If a material holds water, breaks apart, or smells musty after drying, mark it for removal.
For salvageable surfaces, use restoration techniques that match the material: rinse hard surfaces, scrub visible residue, and dry them fast with fans and dehumidifiers.
Work room by room so your team stays organized and safe. Label items clearly, and don’t guess when moisture has reached deep layers.
Acting now helps your household protect shared spaces, reduce hazards, and move toward recovery together.
Discard Waterlogged Porous Items
Strip out waterlogged porous materials fast because they trap moisture, support mold growth, and rarely dry safely after a flood. You should remove carpets, pillows, insulation, and upholstered waterlogged furniture before spores spread into the room.
Bag damaged textiles, seal them, and move them outside with other waste so your cleanup team can work cleanly. If an item has absorbed floodwater, smells musty, or feels heavy after draining, treat it as a loss. You’ll protect your home, your crew, and everyone who returns with you.
Hard surfaces can be washed and disinfected; porous items usually can’t. Work in gloves, boots, and a mask, and keep the discarded pile separate from salvageable materials.
Inspect for Moisture, Odors, and Hidden Mold
Check every affected surface for lingering moisture, musty odors, and hidden mold, because storm water can trap damage inside walls, under flooring, and behind trim.
Use moisture detection tools on drywall, studs, baseboards, and subfloors, then map any readings that stay high.
For odor identification, move slowly through each room and note sour, earthy, or damp smells that signal trapped water.
Open access panels, remove a small trim section if needed, and inspect dark cavities with a flashlight.
If you see staining, swelling, or fuzz, isolate the area fast. You’re not overreacting; you’re protecting your home and everyone in it.
Keep air moving, document findings, and call a remediation professional when moisture won’t drop or mold spreads.
Frequently Asked Questions
How Soon Should Insurance Claims Be Filed After Storm Flooding?
File your storm-flood insurance claim immediately, ideally within 24–72 hours, because filing deadlines start fast. You’ll speed the claim process, protect coverage, and join others who act early, document damage, and stay eligible.
What Safety Gear Is Needed Before Entering a Flooded Building?
You need safety gear first: waterproof boots, gloves, eye protection, mask, and hard hat. Why risk it? Follow safety protocols, wear protective equipment, and check for live wires, sewage, and unstable floors before entering.
When Should Electrical Systems Be Inspected After Flood Exposure?
Inspect electrical systems immediately after floodwater recedes, but only after you’ve de-energized the building and confirmed electrical safety. You shouldn’t restore power until a licensed electrician checks for flood damage, moisture, and hidden faults.
How Can Contaminated Floodwater Affect Indoor Air Quality?
Contaminated floodwater can quickly degrade indoor air quality by releasing indoor pollutants and fueling mold growth. You’ll breathe airborne bacteria, sewage, and chemicals unless you dry, disinfect, and ventilate your space fast.
Should Landscaping Be Checked for Storm-Related Hidden Damage?
Yes, you should check landscaping for hidden storm damage. You’ll need a landscape assessment to spot soil shifts, root exposure, drainage failure, and unstable limbs. Quick action boosts storm resilience and helps your property stay safe together.
Conclusion
You’ve moved fast, but the real test starts now. If you leave even a little moisture behind, mold can take hold before you know it. Check every wall cavity, floor seam, and hidden corner. Keep ventilation running, monitor for musty odors, and remove anything that can’t dry completely. Act like every damp spot is a threat, because it is. The sooner you finish the cleanup, the less damage you’ll face next.